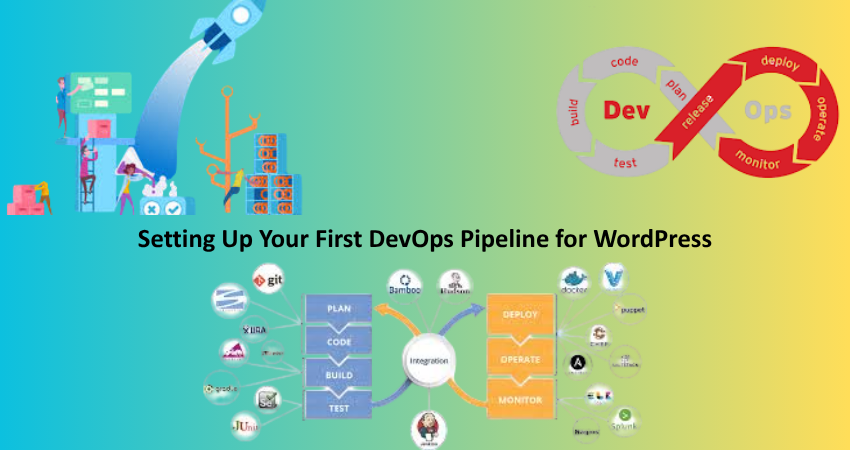
Introduction
Setting up a DevOps pipeline is really one of the best ways to automate, scale, and secure your development workflow for WordPress. However, to wannabe newbies, DevOps is one big word, rather a giant tag in the boom with its affiliation to enterprise-level tools and heavy automation systems. However, a great solution could help even a one-man army or small team working in WordPress achieve this DevOps pipeline with productivity enhancement and accident-free daily deployment outcomes as much as possible. Whether it’s a single WordPress blog or a whole portfolio of client websites-there are plenty of ways that enhancing your operations-in-theory practice through DevOps can change how you build, test, and deploy code.
This guide will walk you through each step of the way in setting up your first DevOps pipeline for WordPress. From understanding what DevOps means to choosing the right tools, establishing environments, automated deployments, and code testing-each section of this guide is subdivided into parts without overwhelming the reader with excess information and delivers practical advice. The really critical objective is to enable you not just to set up a working pipeline but also to grasp the golas or purpose behind every step. You don’t have to be a system administrator or some seasoned backend developer to benefit. All that really needs to happen is that you make a serious commitment to trying to improve that development lifecycle with proven DevOps techniques, transformable to suits the projects of whatever size in WordPress domain.
Understanding DevOps in the Context of WordPress
What Is DevOps and Why Does It Matter?
DevOps is indeed development and operations (Dev + Ops), and thus forms the basis for a CI-CD train that improves software deployments. The scope of DevOps aims at shortening the time for the development cycle while increasing its frequency and improving the quality of software. At the same time, because of the risk associated with updating manually plugins, themes, or codes, WordPress traditional development teams would use a manual process where updating is done on a weekly threshold and all the areas in development are done under an outage. Development operations help automate these tasks through scripting and version control, thus making it more reliable while freeing development teams to be able to focus on building features.
Adapting DevOps on WordPress will result in safer updates with codebases under version control, consistent staging environments, and easy rollbacks when errors occur. As an example, Git ensures that every line of code added to your WordPress theme or plugin is version controlled. Pair that with a CI/CD tool like GitHub Actions or Bitbucket Pipelines, and you can automatically push changes to a staging server for review before pushing live. This minimizes risk and brings professional-grade workflow discipline to WordPress development, which historically leans heavily on manual processes.
Key DevOps Principles Applied to WordPress
Several principles of DevOps have a mapping to WordPress workflows. Automation is one of the foremost ones, from testing to deployment. Often, WordPress projects involve the FTP updating of files, which is error-prone. With proper automation, code quality can be tested, checking for syntax errors, deploying this code change to the servers can be automated, hence reducing manual effort and ensuring reliability. Tools like WP-CLI allow the automation of many tasks related to WordPress via the command-line interface such as plugin updates, working with the database, and caching tasks.
Collaboration is another principle. DevOps insist on cooperation between developers, designers, testers, and sysadmins. In the case of WordPress, integration with your pipeline through Slack or Microsoft Teams could notify your team whenever builds succeed or fail. Finally, tracking is very important. New Relic or Pingdom can track site performance and uptime, giving critical feedback on how your deployments affect actual user experience. These principles make a more mature development lifecycle, also scalable, in WordPress-based sites.
Setting Up Your Development Environment
Choosing Local Development Tools
Without a reliable local development environment, any DevOps pipeline would fail. In Local by Flywheel, DevKinsta, or any other Docker+docker-compose-based setup, you may simulate an environment similar to production. Such local environments can make configuration of PHP versions and MySQL database installations, and can thus run WordPress without access to the Internet. This avoids interruptions to feedback loops while ensuring total control in testing procedures. With Docker, this is really powerful, as now you can represent your infrastructure-as-code and maintain consistency across your staging and production servers.
Selecting a local development tool depends on one’s background and the specific needs of any given project. Docker is the most customizable local development tool for advanced users wanting to exert all control. Local or DevKinsta, though, will probably be the more beginner-friendly options due to their intuitive GUI, automatic SSL, and one-click WordPress installation options. No matter what, the goal remains very much the same: to bridge the gap between local and staged environments to lessen the “works on my machine” dilemma through reducing the best chance of code divergence between local and live.
Managing Code With Version Control (Git)
Git is the cornerstone of any modern DevOps pipeline. It allows you to track changes in your WordPress themes, plugins, or even full-site configurations. Each commit represents a snapshot of your project, enabling you to roll back changes, create branches for new features, or merge fixes into your main codebase. Hosting your Git repositories on platforms like GitHub, GitLab, or Bitbucket opens the door to automation tools, collaboration, and backup protection.
Git for WordPress requires clear setup with respect to what to track. Core WordPress files should usually be ignored unless you are developing a custom fork. The focus, instead, should be on versioning theme files (/wp-content/themes/your-theme) and custom plugins (/wp-content/plugins/your-plugin). Make an entry in the .gitignore file to exclude uploads, cache files, and environment-specific configurations. Hence once you have versioned your code, it will be possible to set off CI/CD workflows on every push or merge, which ensures that your DevOps pipeline will be running on a solid and well-documented basis.
Building the CI/CD Pipeline
Integrating Continuous Integration Tools
CI means these automated tests will run whenever code is committed in any manner. In WordPress, CI can go as far as having the syntax checks running for code followed by running unit tests for plugins, and full installations of WordPress in a Docker container for integration testing. There are a wide range of such tools which can help in defining workflows triggered on events like git push, pull requests, or tag creation-such as GitHub Actions, GitLab CI, or Bitbucket Pipelines for example.
So a very basic CI workflow for WordPress might be installing dependencies such as Composer or npm; running the PHP linter using a command such as php -l; and doing coding analysis using PHP_CodeSniffer or PHPStan for example. A more sophisticated solution would be to create a temporary WordPress instance using WP-CLI or Docker, deploy the theme/plugin there, and run automated tests. These checks help capturing bugs before reaching staging or production, which saves time and prevents mistakes in front of users. With a good CI configuration, you make sure code quality is enforced on every repository commit, not just at the time of major releases.
Deploying With Continuous Delivery or Deployment
So now, the moment your code passes CI checks, it gets ready for delivery. Continuous Delivery (CD) automatically transfers the code from the development environment to staging or production servers. This could involve syncing files through SFTP, SSH, or using deployment plugins such as WP Pusher or DeployBot. Advanced users can even take advantage of shell scripts activated by CI events, which would allow zero-downtime updates and rollback capabilities.
Above all, the best deployment pipelines will include automated backups, downtime detection, and version tagging. To take an example, before the pipeline conducts any modification on the production server, it would backup the WordPress database and current file state followed by health checks that would ensure the homepage loads correctly and does not show errors in the log once deployment is finished. This assures you that there’s no chance of your site crashing due to this change. Now, you’ll not feel insecure about the changes ruining your site, the more automated the delivery process is, the more repeatable, safe, and faster your deployments will be, thus negating the need for the manual copying of files across via FTP.
Managing Staging and Production Environments
Creating a Reliable Staging Environment
The staging environment is an important component of a WordPress DevOps pipeline. Your production site is an exact copy of it. Test code changes or plug-in updates or database migrations without fear of crashing into the live site. Managed WordPress hosts mostly have one-click staging environment but you can also set one up by yourself on a subdomain or a different server using tools like Docker or WP-CLI.
Keep your staging up to date with production data and files but without sensitive user data. E.g. staging sites may stop outgoing emails so that real users are not accidentally contacted, and email addresses may be masked in the database to prevent leaking. Safe sync of data can be done with scripts or plugins. A proper staging environment would allow you to validate a CI/CD deployment or test out new features, and even share previews with either the clients or team members; acting as the final check before production release.
Syncing and Maintaining Consistency
DevOps pipelines are successful only when there is similarity amongst environments. Server configurations, PHP versions, or database schemas that differ hold an unhappy promise of bugs which are tough to locate. With infrastructures as code (IaC), like Docker, what you can achieve is a server setup that can be described in configuration files under version control-it would be easy to reproduce across the various environments: development, staging, and production.
Also, a periodic file and database sync between staging and production is good practice to keep your staging as close as possible to reliable testing grounds. Automate the process using bash scripts or WordPress CLI commands. Staging is for testing backups, performance audits, and UI/UX updates. Worlds are also much friendlier on the deployment side when temperatures dip. Maintaining a coherent environment across the board is a boost for confidence in deployments, and the team works in a consistent, predictable ecosystem to allow experimentation without affecting the experience of the live user.
Monitoring, Maintenance and Rollback Strategies
Implementing Monitoring and Logging Tools
At their best, CI/CD Pipelines could potentially create a perfect heaven for developers, and while they don’t treat problems completely, they certainly swallow some light. Therefore, here, monitoring is the essential element in your entire DevOps infrastructure. Monitoring tools such as New Relic and Datadog, as well as open-source options such as Netdata, help to check server performance, investigate what is slowing down the database, and tell you when servers are down.To know what could really go awfully wrong with your WordPress installation, plugins such as Query Monitor and WP Server Stats would be quite helpful since they tell you what is wrong in real time, possibly referring to performance bottlenecks, database queries, and plugin loading times.
However, maybe you want to add to that logging option that is available under WP_DEBUG_LOG to enable the recording of any PHP errors and notices in here. The combined power of monitoring and logging provides insight into how the site performs under load conditions, during updates, and after deployments. This feedback loop connects the dots between observations and actions, eliminating pain points more quickly, leading to better performance enhancements, and hence better user experience, especially during peaks or after major releases.
Creating Backup and Rollback Systems
Each deployment strategy that is followed must have a backup. The backup and rollback systems would offer protection to the systems against any eventualities such as failed deployments, or data loss due to some unforeseen bugs. UpdraftPlus or Duplicator-and shell scripts triggered by CI-will be good to use to automate the backup of databases and files before every single deployment. The backups would be securely stored in the cloud, on the likes of Amazon S3 or Google Drive, or in external servers in order to enhance redundancy.
The rollback strategies could range from reverting Git commits and restoring previous deployments to rolling back database changes. For instance, gradual database changes are facilitated by WP Migrate DB Pro, while Git will allow you to roll back the code to the last known good state. Some managed WordPress hosting platforms provide one-click restore features, thus making the restoration even easier. Essentially, with all these systems implemented, even if there’s a broken deployment, it is not the end of the world-it is a slight hiccup that you recover from within minutes instead of hours.
Conclusion
Indeed, while setting up your first DevOps pipeline for WordPress may seem like a gargantuan task, a correct combination of tools and practices will morph the occasion into a major milestone towards smarter development. By applying DevOps practices like automated testing, version control, continuous integration, and deployments, you’re creating a workflow that’s scalable, collaborative, and resilient: not just for big development teams or corporate sites, but even solo developers or small agencies could benefit greatly from a reliable DevOps pipeline.
Make smaller things first, then build larger things. The first thing to implement is Git for version control. Gradually implement CI tools, like GitHub Actions, first without testing and monitoring, and as the pipeline gains maturity, then add testing, staging, and monitoring features to it. Generally, a working DevOps pipeline will become an indispensable part of your WordPress development life cycle over time, ensuring quality and shortening delivery timelines, thus enabling you to grow and prosper with confidence in experimentation and scaling. The future of WordPress development will be automation. This future begins with your first pipeline.